A reliable maintenance audit trail is not “extra paperwork.” It is the operational backbone that improves accountability, reduces repeat work, supports compliance, and makes reporting trustworthy across your portfolio. When records are scattered across emails, spreadsheets, and phone calls, the team loses time reconstructing what happened, why decisions were made, and who owns next steps.
This guide explains what to capture—consistently—for every work order, and how to connect that data to the adjacent modules that drive performance: dashboards and reporting, inspections, location structure, asset history, and role-based accountability. If you are consolidating workflows into a single system of record, start with property maintenance software.
What Is a Maintenance Audit Trail?
A maintenance audit trail is the complete, time-stamped history of a request and work order from intake to closure: who submitted it, what was reported, how it was prioritized, who approved it, who executed it, how status changed, what work was performed, and how completion was verified. The audit trail should be consistent across properties so managers can trust the record during escalations, compliance checks, vendor disputes, and portfolio performance reviews.
A strong audit trail becomes much easier when you use a structured system for work order management rather than unstructured communication.
Why the Audit Trail Matters to Property Managers
- Accountability: Clear ownership and time-stamped actions reduce “who is handling this?” confusion.
- Faster resolution: Better context reduces rework, repeat diagnostics, and wasted site visits.
- Compliance readiness: Documented verification supports inspections, safety obligations, and internal controls.
- Better reporting: Accurate data creates credible KPIs and trend analysis across buildings and units.
- Reduced disputes: A complete record helps resolve resident complaints and vendor disagreements efficiently.
The Work Order Audit Trail Checklist: What to Record Every Time
Use the checklist below as your standard. When every work order captures the same core fields, you gain consistency, faster triage, better reporting, and a reliable operational history.
1) Request Intake Details
- Requester: resident or internal staff (name and contact details as applicable).
- Submission channel: portal, staff entry, phone-assisted entry (captured as a field, not a memory).
- Issue category and subcategory: plumbing, HVAC, electrical, appliance, common area, etc.
- Problem description: what is happening, when it started, and any conditions (intermittent, constant).
- Access notes: entry instructions, pets, lockbox codes (where permitted), preferred times.
- Attachments: photos/videos when available to reduce diagnostic time.
If your operation handles resident-initiated intake at scale, structured submission via a resident maintenance requests portal is the fastest way to standardize data quality.
2) Location Mapping: Property, Building, Unit
- Property: portfolio identifier and site name.
- Building: building number/name where applicable.
- Unit: unit number or space reference (including common areas where relevant).
Location accuracy is the difference between usable reporting and misleading reporting. A reliable audit trail depends on consistent structure through property, building, and unit management.
3) Priority, Severity, and Service Expectations
- Priority level: emergency, urgent, routine (use a standard definition for each).
- Target response time: internal SLA expectation aligned to priority.
- Safety/compliance flag: gas smell, water intrusion, electrical hazard, accessibility issue, etc.
4) Approval Record and Decision Rationale
- Approval status: approved, rejected, deferred, needs more info.
- Approver: who approved (or who rejected) and timestamp.
- Notes: brief rationale, budget considerations, scheduling constraints, or vendor requirements.
Approvals become unambiguous when embedded in the same workflow as the work order, rather than scattered in email threads. That structure is central to disciplined work order management.
5) Assignment and Execution Details
- Assigned to: technician, team, or vendor.
- Assignment time: timestamp and any reassignment history.
- Scheduled window: planned date/time (if applicable) and reschedule reasons.
- Work performed: clear notes of actions taken, parts used, and findings.
- Completion standard: what “done” means for this category (e.g., tested, verified, cleaned up).
6) Status Changes and Notes: The “Story” of the Work Order
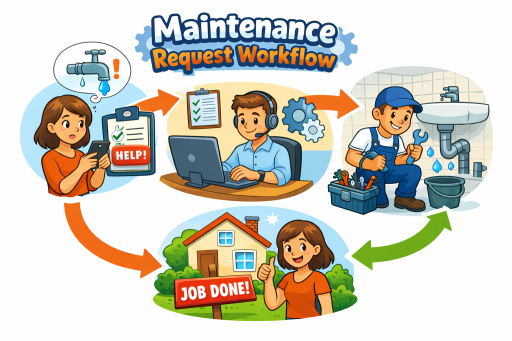
- Status timeline: submitted → reviewed → approved → assigned → in progress → completed.
- Blockers: parts delay, access issue, vendor scheduling, resident no-show.
- Internal notes: concise, factual, and time-stamped to avoid interpretation disputes later.
7) Inspection and Verification
- Verification method: manager sign-off, inspector review, photo evidence, testing results.
- Inspection outcome: pass/fail and comments.
- Follow-up action: new work order created if rework is needed.
Quality assurance is strongest when tied to a structured inspection workflow using property inspection software. This is a key connection in the Work Orders ↔ Reporting ↔ Inspections loop.
8) Asset Context and Installation History
- Asset involved: appliance, HVAC unit, water heater, door hardware, etc.
- Installation date and details: model, serial, install vendor (as available).
- Recurring pattern notes: whether this is a repeat issue for the same asset.
Capturing lifecycle context helps teams decide repair versus replace using evidence. This is enabled through asset installation records, which connects to reporting in the Properties/Units ↔ Assets ↔ Reporting loop.
9) Reporting Fields That Make Metrics Trustworthy
- Time-to-review: request submitted to manager review.
- Time-to-approve: review to approval decision.
- Time-to-assign: approval to assignment.
- Time-to-complete: assignment to completion.
- Repeat indicator: whether it is a repeat issue within a defined period (e.g., 30–90 days).
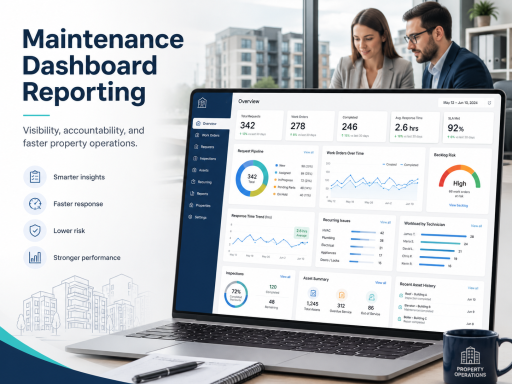
If these fields are standardized, dashboards stop being “best guesses” and become operational tools. This is where maintenance dashboards and reporting deliver measurable performance visibility across the portfolio.
10) Permissions and Role-Based Accountability
- Who can approve: prevent unauthorized approvals and inconsistent governance.
- Who can close: ensure work is not closed without proper completion standards.
- Who can view what: limit access by property scope and job function.
A credible audit trail requires the right people doing the right actions. Use user and role management to align permissions to responsibilities and maintain accountability at scale.
Common Audit Trail Failures and How to Prevent Them
Failure: “Completed” without verification
Prevent this by requiring a consistent completion standard and, where appropriate, tying work orders to inspection outcomes. If your portfolio has recurring issues or compliance sensitivity, verification should be part of the normal workflow.
Failure: Missing location structure
If work is not reliably mapped to property/building/unit, reporting becomes noisy and trends become misleading. Location accuracy should be non-negotiable because it underpins performance measurement and repeat-issue analysis.
Failure: Notes that are vague or emotional
Audit trails should be factual, concise, and time-stamped. “Resident upset” is less helpful than “Resident reported leak under sink at 3:15 PM; access obtained at 4:05 PM; valve tightened and tested; no leak observed after 10-minute run.”
Failure: Permissions that don’t match responsibilities
If too many users can approve, reassign, or close work orders, accountability becomes unreliable. Role-based control ensures audit records remain meaningful.
How to Implement an Audit Trail Standard Without Slowing Work
- Define required fields: intake, location, priority, approval, assignment, status, completion, verification.
- Create category standards: use consistent categories and priority definitions across all properties.
- Train on “notes discipline”: factual, time-stamped, outcome-focused.
- Measure what matters: time-to-assign, time-to-complete, repeat rate, inspection follow-ups.
- Review monthly: use reporting to identify bottlenecks and recurrence patterns and update standards accordingly.
Call to Action
If you want to replace emails, spreadsheets, and phone calls with one centralized workflow that improves accountability and response time, implement an audit-ready work order standard and connect it to reporting, inspections, and asset history.
To evaluate TaskEstate options and rollout scope, review pricing.
FAQ
What is the minimum data I should record for every work order?
At minimum: requester, location (property/building/unit), category, priority, approval record, assignment, status timeline, completion notes, and timestamps. Without these, auditability and reporting accuracy degrade quickly.
How do inspections fit into an audit trail?
Inspections provide verification. They confirm that work was completed to standard and create documented outcomes that reduce repeat issues and improve compliance readiness.
How do I use an audit trail to improve performance?
Use standardized timestamps and fields to measure review time, approval time, time-to-assign, time-to-complete, and repeat rates. Portfolio dashboards then identify bottlenecks and recurring issues by property, building, unit, or asset.